Installing a certificate for UCMA v2.0 applications
Posted: March 21st, 2009 | Author: Michael | Filed under: OCS Development, UCMA 2.0 | No Comments »The Internet can be a disturbing place. You may not expect that hundreds thousands of Internet delinquents are out to hijack your UCMA 2.0 application, but in the realm of Internet security, as with tipping your barber, the rule is always “better safe than sorry.”
Accordingly, when you are running a UCMA 2.0 application on a separate server, you need to create a certificate for it that is trusted by Office Communications Server. Since a number of people have asked, I am going to show you how to do this.
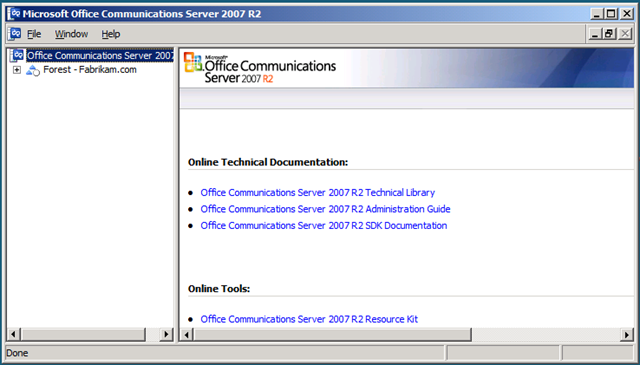
Our journey begins on the server that is functioning as your Standard Edition Server or a Front End Server. On that machine, go to the Office Communications Server 2007 R2 management console at Start –> All Programs –> Administrative Tools –> Microsoft Office Communications Server 2007 R2. You will see the lovely window depicted below. (Click on the screenshot to see a larger version.)
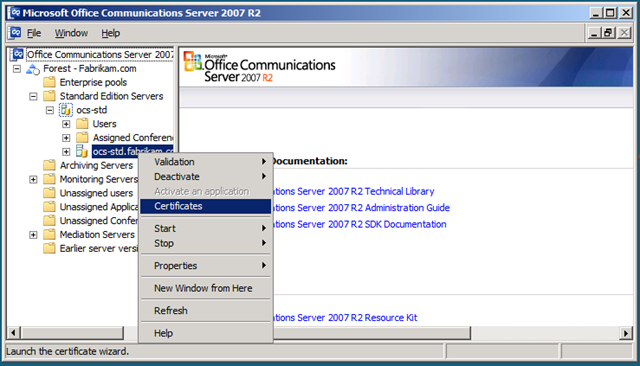
Expand those nodes in the left panel to get to your Standard Edition Server or Front End Server, and right-click on it. Choose the cleverly-named Certificates item.
You will get a new window for the Certificates Wizard. Click Next on the instructions page. Choose Create a new certificate and hit Next.
The next few screens walk you through the process of creating a certificate.
- Delayed or Immediate Request: You will want to choose Send the request immediately to an online certification authority.
- Name and Security Settings: For the name of the certificate you can use the fully qualified domain name (FQDN) of the server you want to run UCMA 2.0 applications on. Make sure that Mark cert as exportable is checked.
- Organization Information: The Organization field usually contains your organization’s legal name, and the Organizational unit field contains your department name.
- Your Server’s Subject Name: The subject name should be the exact FQDN of the server you’ll be using for your UCMA 2.0 applications.
- Geographical Information: You can handle this one.
- Choose a Certification Authority: Just what it says. You will need to have the root certificate for this certification authority installed on your UCMA 2.0 application server as well.
- Request Summary: Make sure everything looks right.
- Assign Certificate Task: Select Assign certificate later.
Once you’ve finished with the Certificate Wizard, you’ll need to export the certificate to move it to the other server. Right-click again on your server in the list, and choose Certificates. This time,choose Export a certificate to a .pfx file.
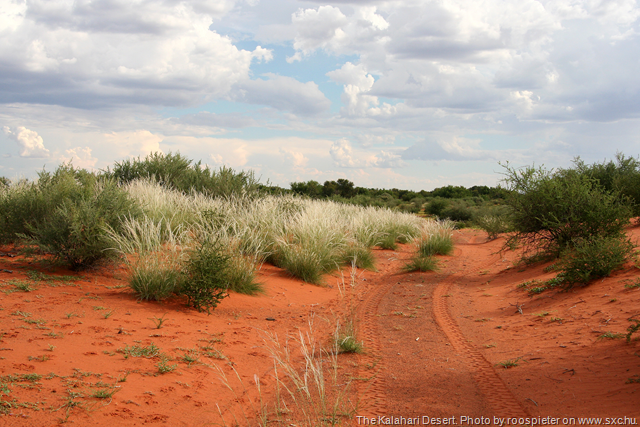
In the following screens,choose the certificate you just created, with the FQDN of your application server, and specify a password. Save the file in a remote and inaccessible location somewhere in the middle of the Kalahari Desert.
At this point, we will take a two minute break so you can transport your freshly minted .pfx file to your UCMA 2.0 application server. You can do this by creating a shared directory on one of the servers and sticking the .pfx in there, or by some other method of your choosing.
…
Okay, now that we’re back, it’s time to import the certificate on your application server. Open the Microsoft Management Console. You can do this by going to the Start menu and typing mmc.
In the Management Console, go to File –> Add/Remove Snap-in. Add the Certificates snap-in by choosing it in the list on the left and clicking Add. Choose Computer account and click Next and Finish. Click OK.
Expand the Certificates node.
It’s a downhill run from here, folks. Just right-click on Personal and select All Tasks –> Import. In the open dialog that comes up, you’ll need to select Personal Information Exchange (.pfx, .p12) in the file type drop-down next to the file name. Choose the .pfx file and click Open. Click Next, enter your password from earlier, Next, Next, Finish.
Congratulations! You’ve set up a certificate on your application server, you can sleep soundly at night, secure from those ten million UCMA 2.0 application server hijackers at large in cyberspace, and all is well in the world.
Please feel free to leave comments or contact me if you have any issues with this scary but rewarding process of creating certificates for UCMA 2.0 applications.
Leave a Reply